SEO (Search Engine Optimization) optimization is a crucial aspect for any website, and this is no different for sites built with Jekyll, the popular static site generator. By nature, Jekyll offers a lean and fast-loading website structure, which is a positive factor for SEO. However, there are specific strategies you can employ to further enhance your Jekyll site’s SEO.
-
Optimizing Content: The cornerstone of SEO is high-quality, relevant content. With Jekyll, you can easily manage content through Markdown files, ensuring that your text is clear, well-structured, and includes appropriate keywords.
-
URL Structure: Jekyll allows for customization of URL structures. By using meaningful and keyword-rich URLs, you can make your pages more understandable to search engines and users.
-
Meta Tags: Incorporate meta tags for titles and descriptions in your Jekyll site’s HTML templates. These tags help search engines understand the content of your pages and display them appropriately in search results.
-
Mobile Responsiveness: Jekyll supports responsive design themes, which is vital since mobile-friendliness is a significant ranking factor for search engines.
-
Loading Speed: Jekyll generates static sites, which generally load faster than dynamic websites. You can further optimize this by minimizing CSS, JavaScript, and image sizes.
-
Sitemaps and Robots.txt: Use Jekyll plugins to generate sitemaps automatically and manage robots.txt files, ensuring search engines can efficiently crawl and index your site.
-
Social Media Integration: Integrating social media sharing options can increase the visibility of your content, indirectly boosting your SEO efforts.
-
Analytics: Incorporate tools like Google Analytics to track your site’s performance, understand your audience better, and fine-tune your SEO strategies.
-
Regular Updates: Regularly updating your website with fresh content can signal to search engines that your site is active and relevant.
By implementing these strategies, you can significantly improve your Jekyll site’s SEO, making it more visible and accessible to your target audience.
1. SEO
1.1 robots.txt
Use Jekyll plugins to generate sitemaps automatically and manage robots.txt files, ensuring search engines can efficiently crawl and index your site.
I.e., Prevent web crawlers from specific content.
# e.g. /note.

User-agent: *
Disallow: /note/
Sitemap: http://bamr87.github.io/sitemap.xml

User-agent: *
Disallow: /private/
Disallow: /tmp/
Disallow: /duplicate-content/
Disallow: /under-development/
Allow: /public-content/
Disallow: /*.gif$
Disallow: /*.xls$

# Sitemap location
Sitemap: https://www.yoursite.com/sitemap.xml

# Specific rules for certain bots
User-agent: Googlebot
Disallow: /no-google/

User-agent: Bingbot
Disallow: /no-bing/

# Delay between successive requests (in seconds)
Crawl-delay: 10
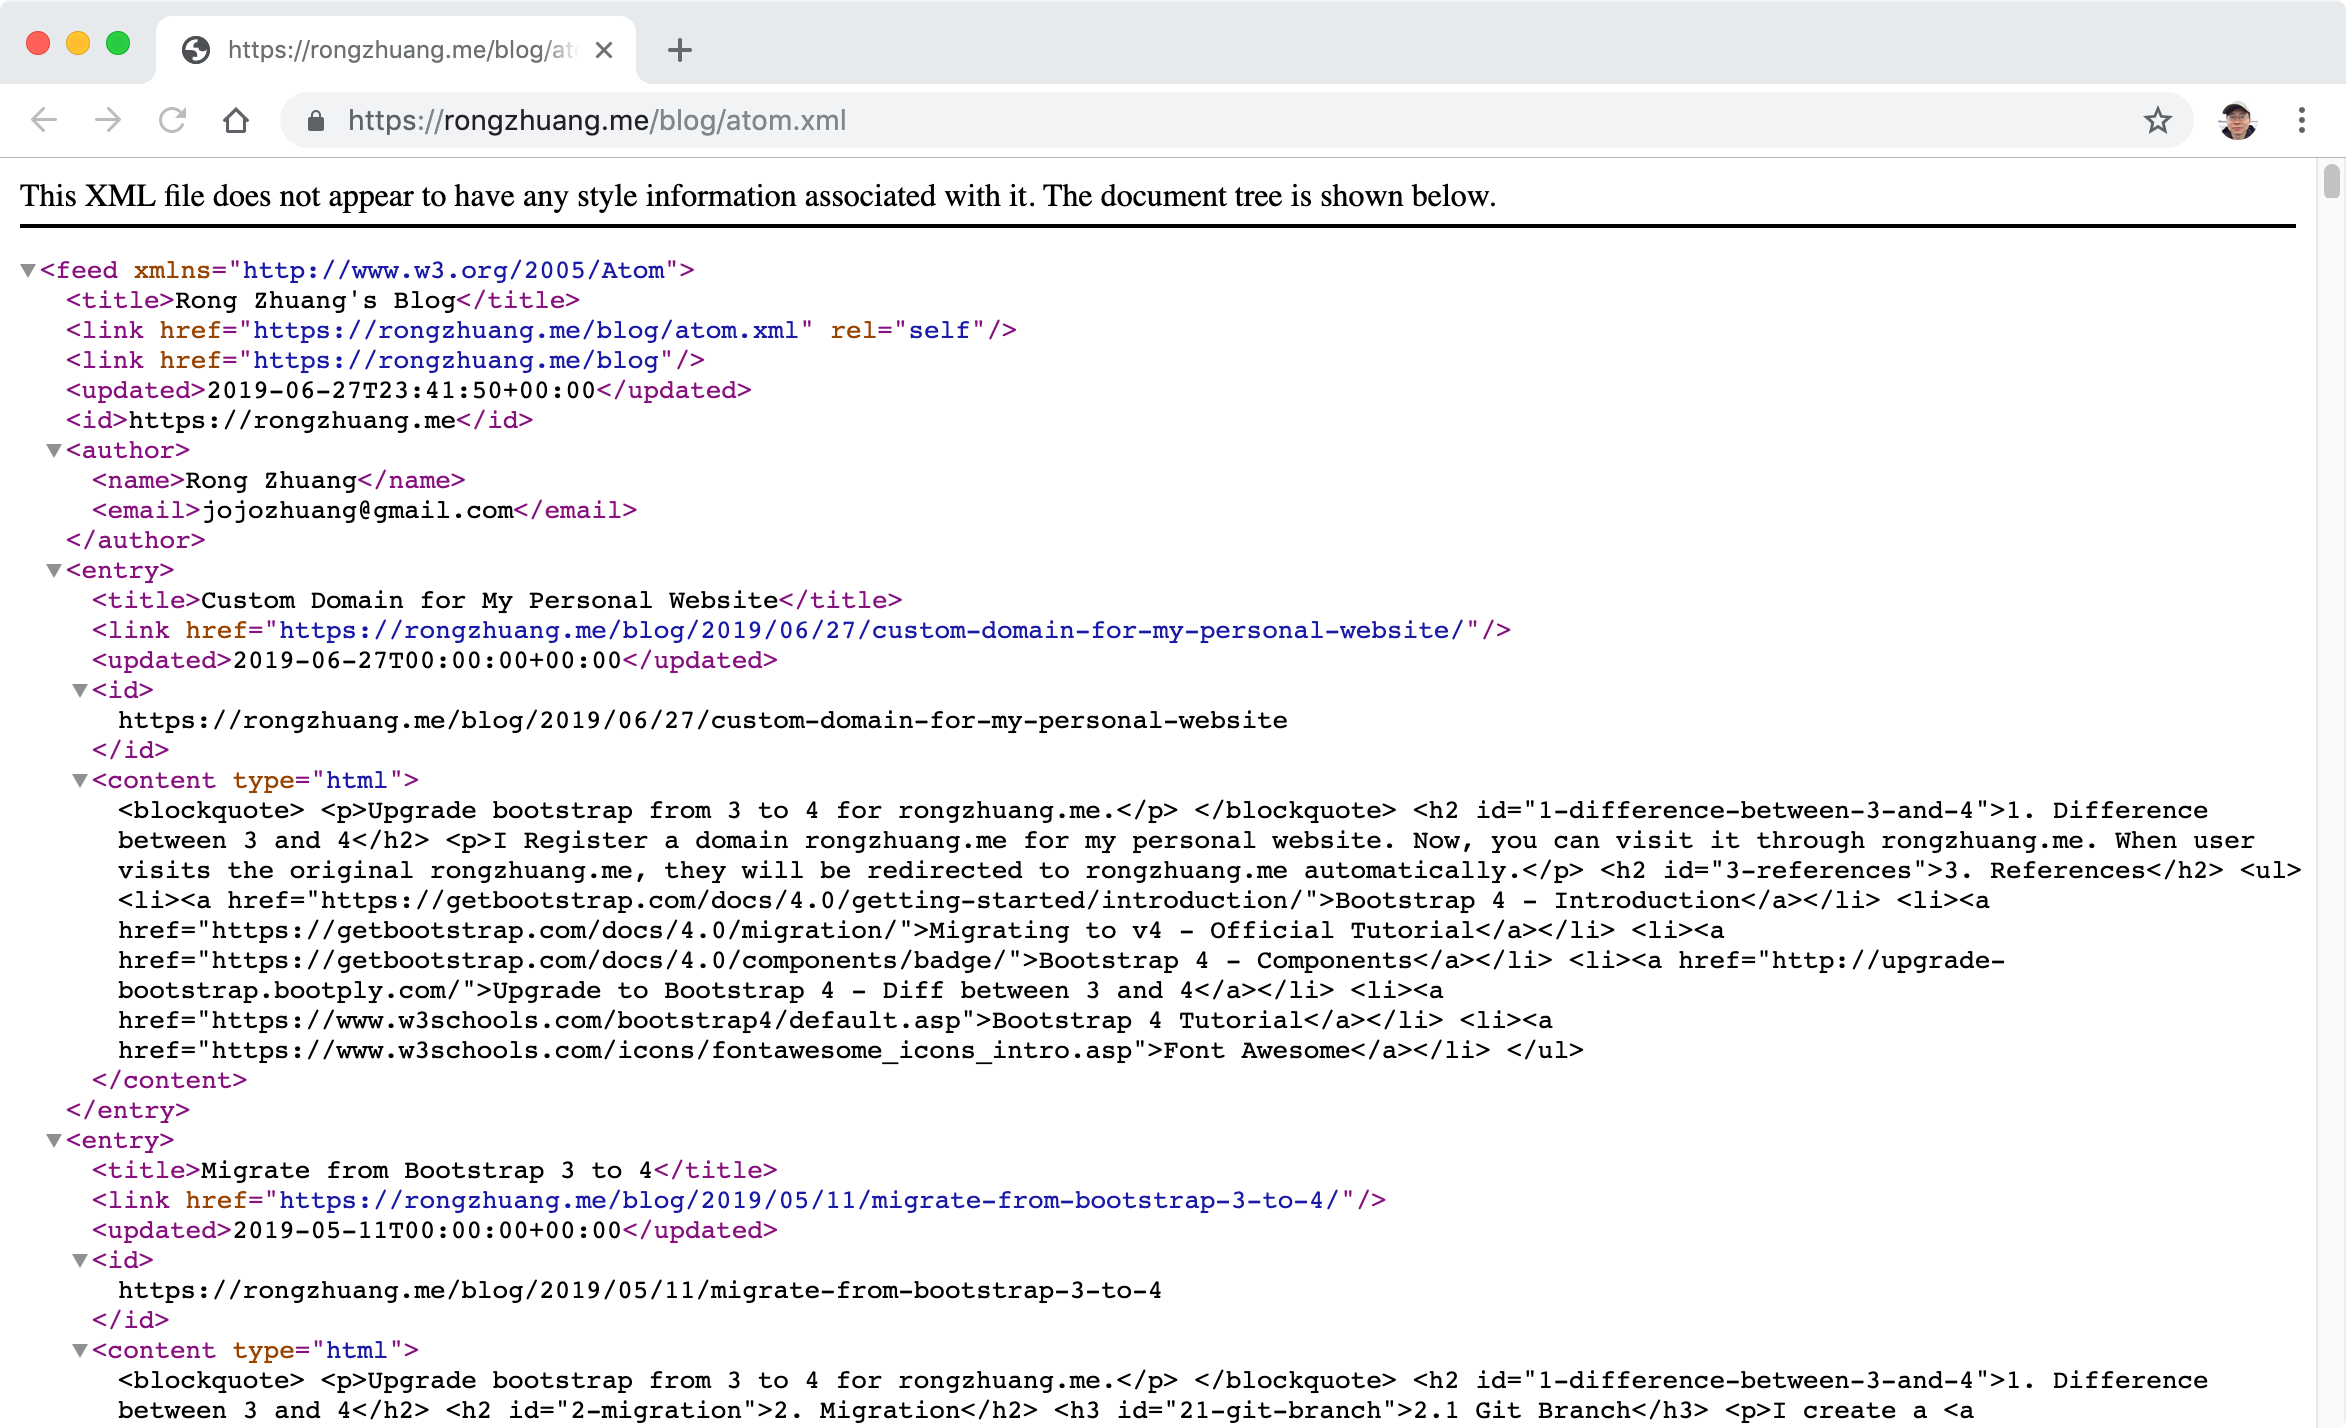
1.2 RSS Feed
Edit /blog/atom.xml
---
layout: nil
type: blog
---

<?xml version="1.0" encoding="utf-8"?>
<feed xmlns="http://www.w3.org/2005/Atom">

  <title>{{ site.blogtitle }}</title>
  <link href="{{ site.url }}/blog/atom.xml" rel="self"/>
  <link href="{{ site.url }}/blog"/>
  <updated>{{ site.time | date_to_xmlschema }}</updated>
  <id>{{ site.url }}</id>
  <author>
    <name>{{ site.author.name }}</name>
    <email>{{ site.author.email }}</email>
  </author>

  {% for post in site.posts %}
      <entry>
        <title>{{ post.title }}</title>
        <link href="{{ site.url }}{{ post.url }}"/>
        <updated>{{ post.date | date_to_xmlschema }}</updated>
        <id>{{ site.url }}{{ post.id }}</id>
        <content type="html">{{ post.content | xml_escape }}</content>
      </entry>
  {% endfor %}

</feed>
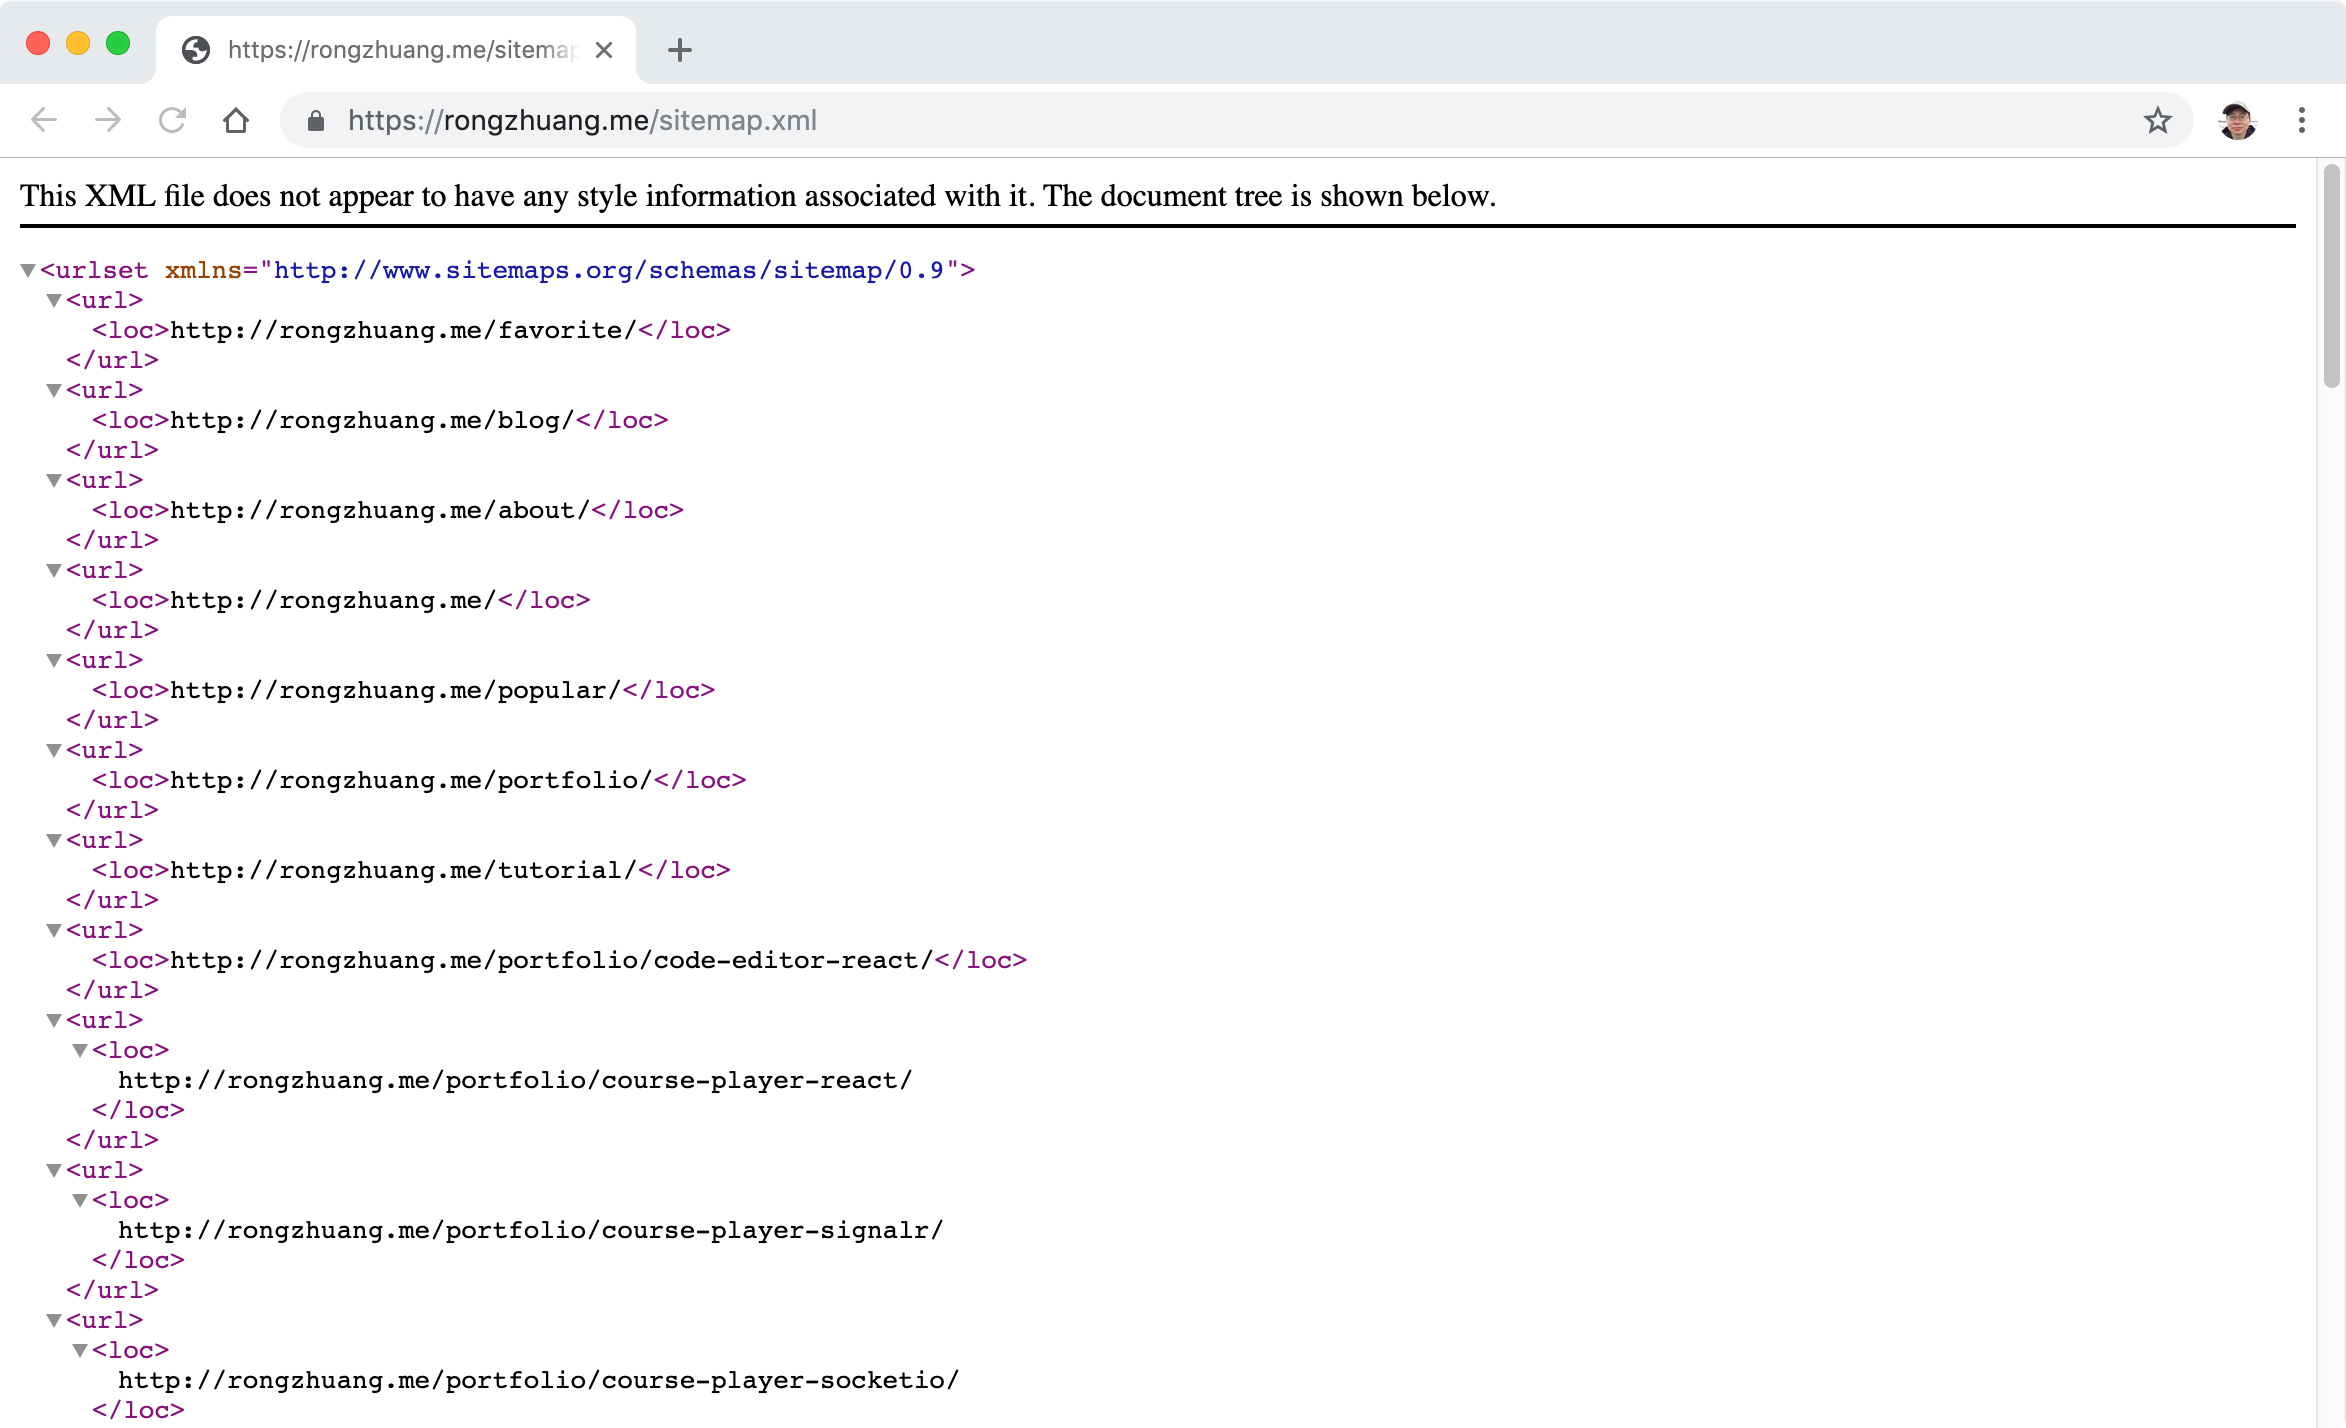
1.3 Sitemap
---
---
<?xml version="1.0" encoding="UTF-8"?>
<urlset xmlns="http://www.sitemaps.org/schemas/sitemap/0.9">
  {% for page in site.pages %}
    {% if page.layout != nil and page.layout != 'feed' and page.url != '/note/' and page.url != '/index_note/' and page.url != '/index_tutorial/' and page.url != '/search/' and page.url != '/blog/atom.xml' and page.url != '/contact/'%}
      <url>
        <loc>http://{{ site.github_user }}.github.io{{ page.url | remove: 'index.html' }}</loc>
      </url>
    {% endif %}
  {% endfor %}

  {% assign portfolios = site.portfolio %}
  {% assign blogs = site.posts %}
  {% assign posts = portfolios | concat: blogs %}
  {% for post in posts %}
    <url>
      <loc>http://{{ site.github_user }}.github.io{{ post.url | remove: 'index.html' }}</loc>
    </url>
  {% endfor %}

</urlset>
2. Caching with CDN
2.1 Create a new account in Cloudflare
Add a new site, note the two name servers
- miki.ns.cloudflare.com
- owen.ns.cloudflare.com
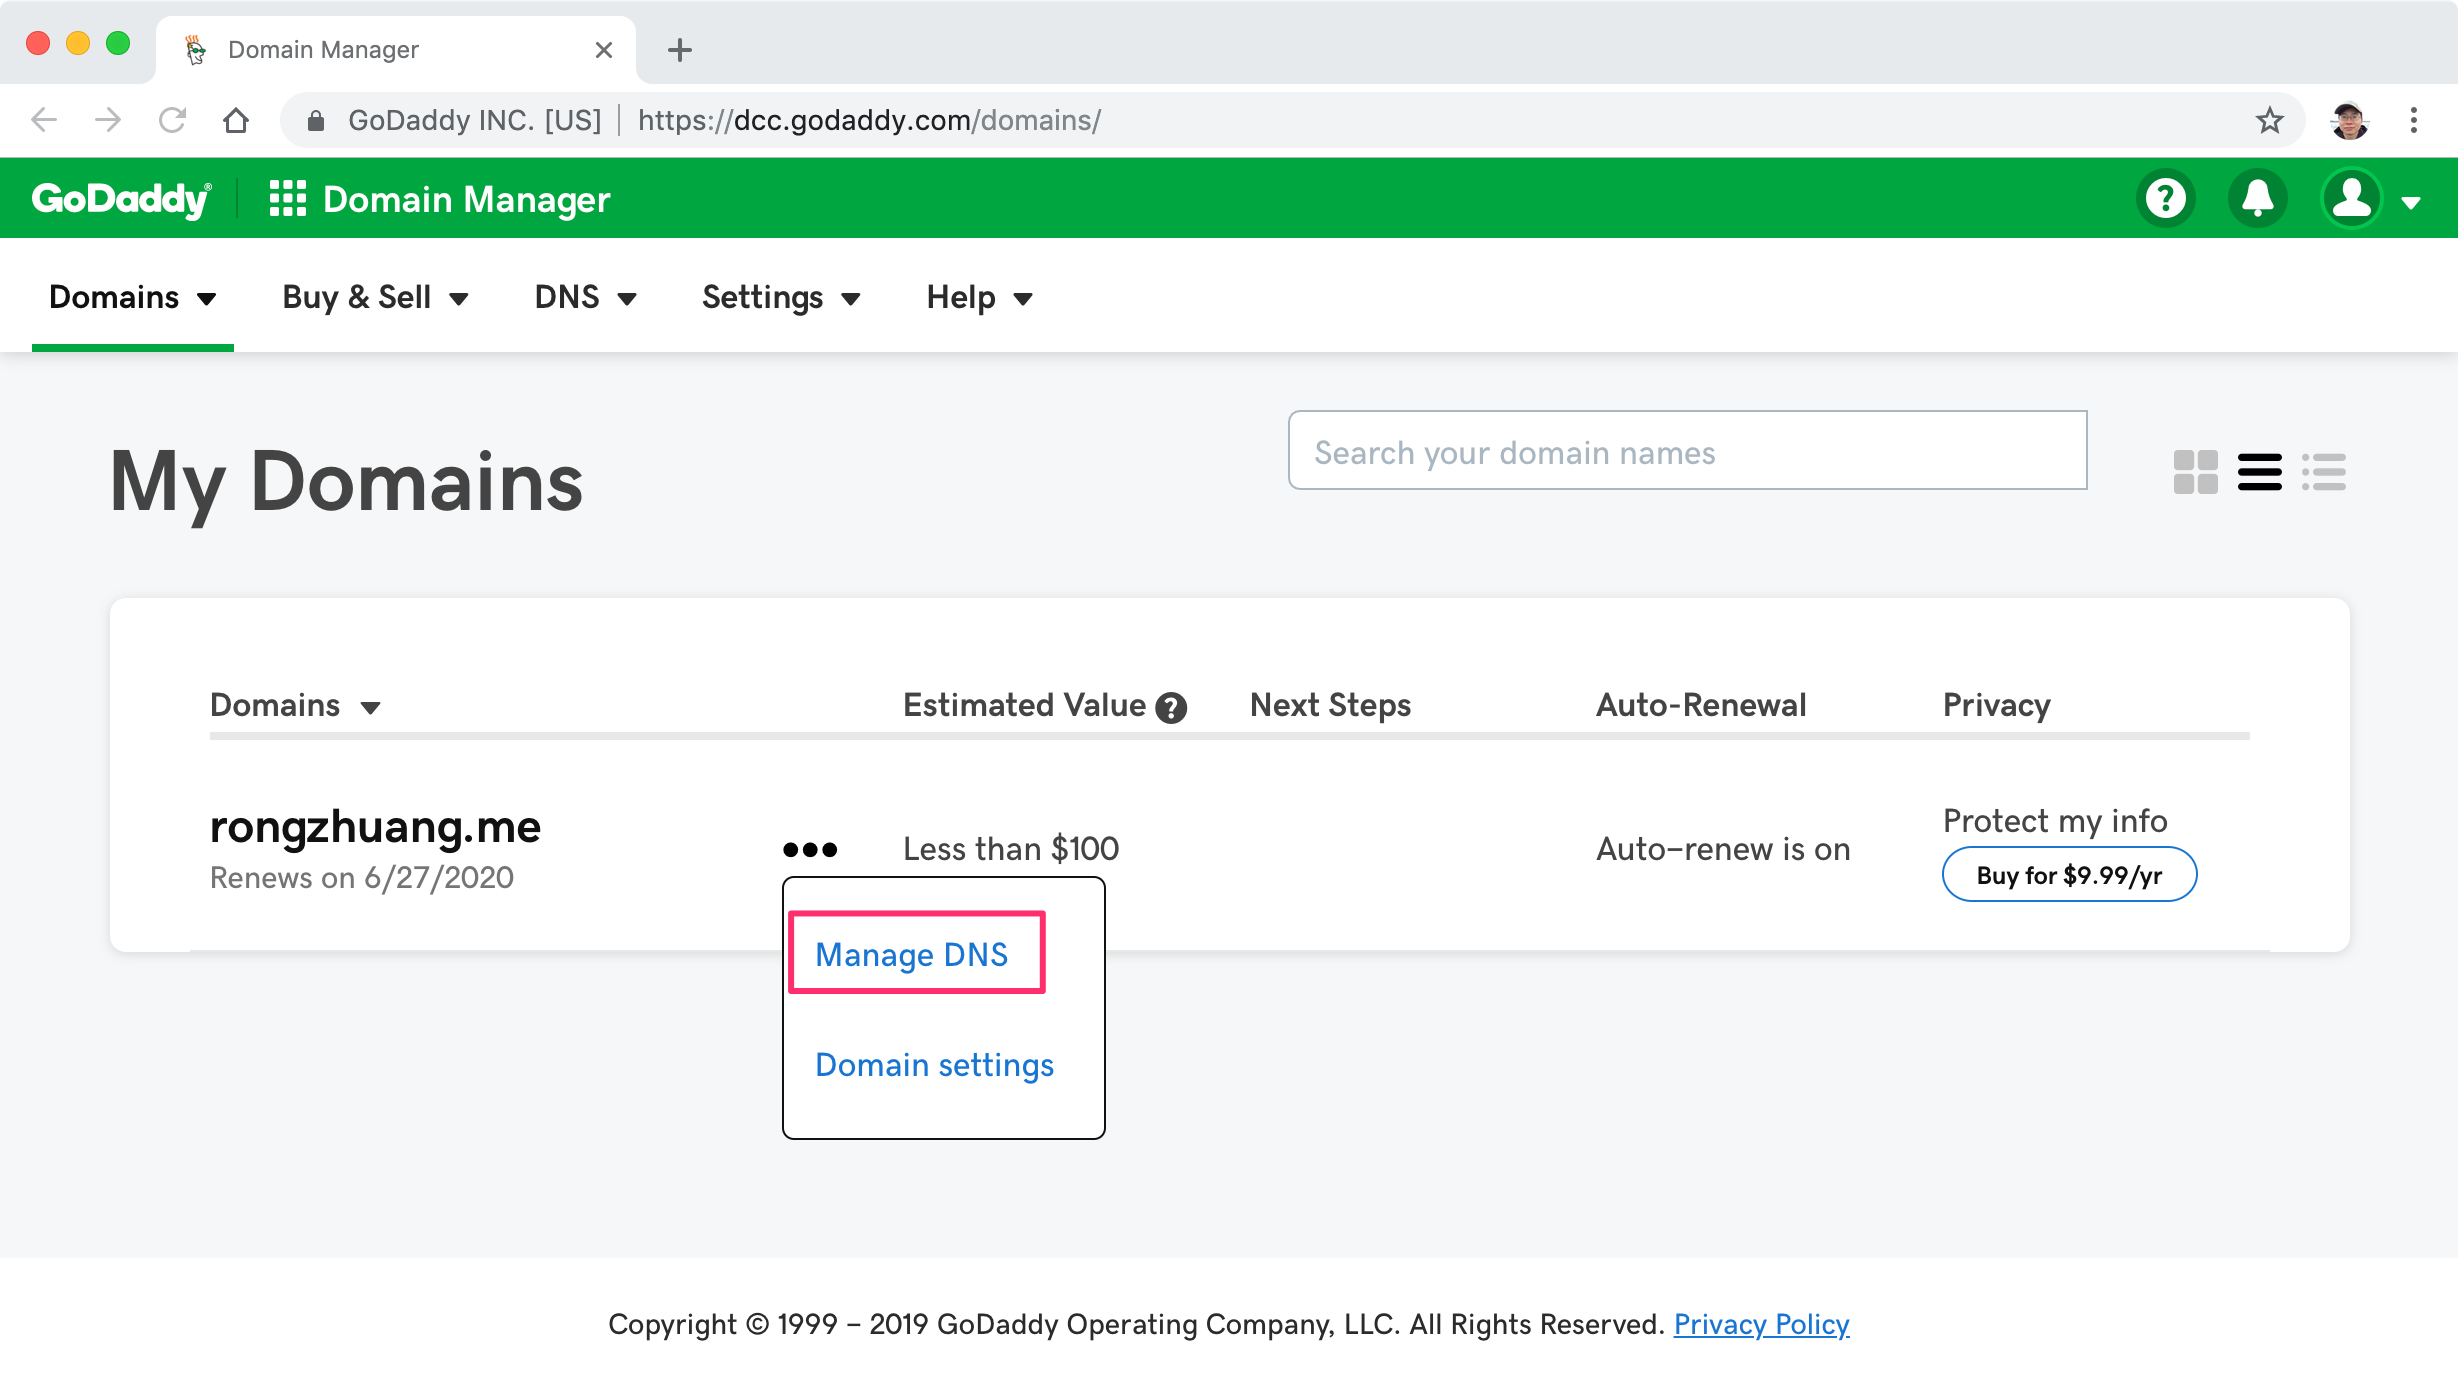
2.2 Update Name server in GoDaddy
Find your domain, click the three dot button, choose ‘Manage DNS’.
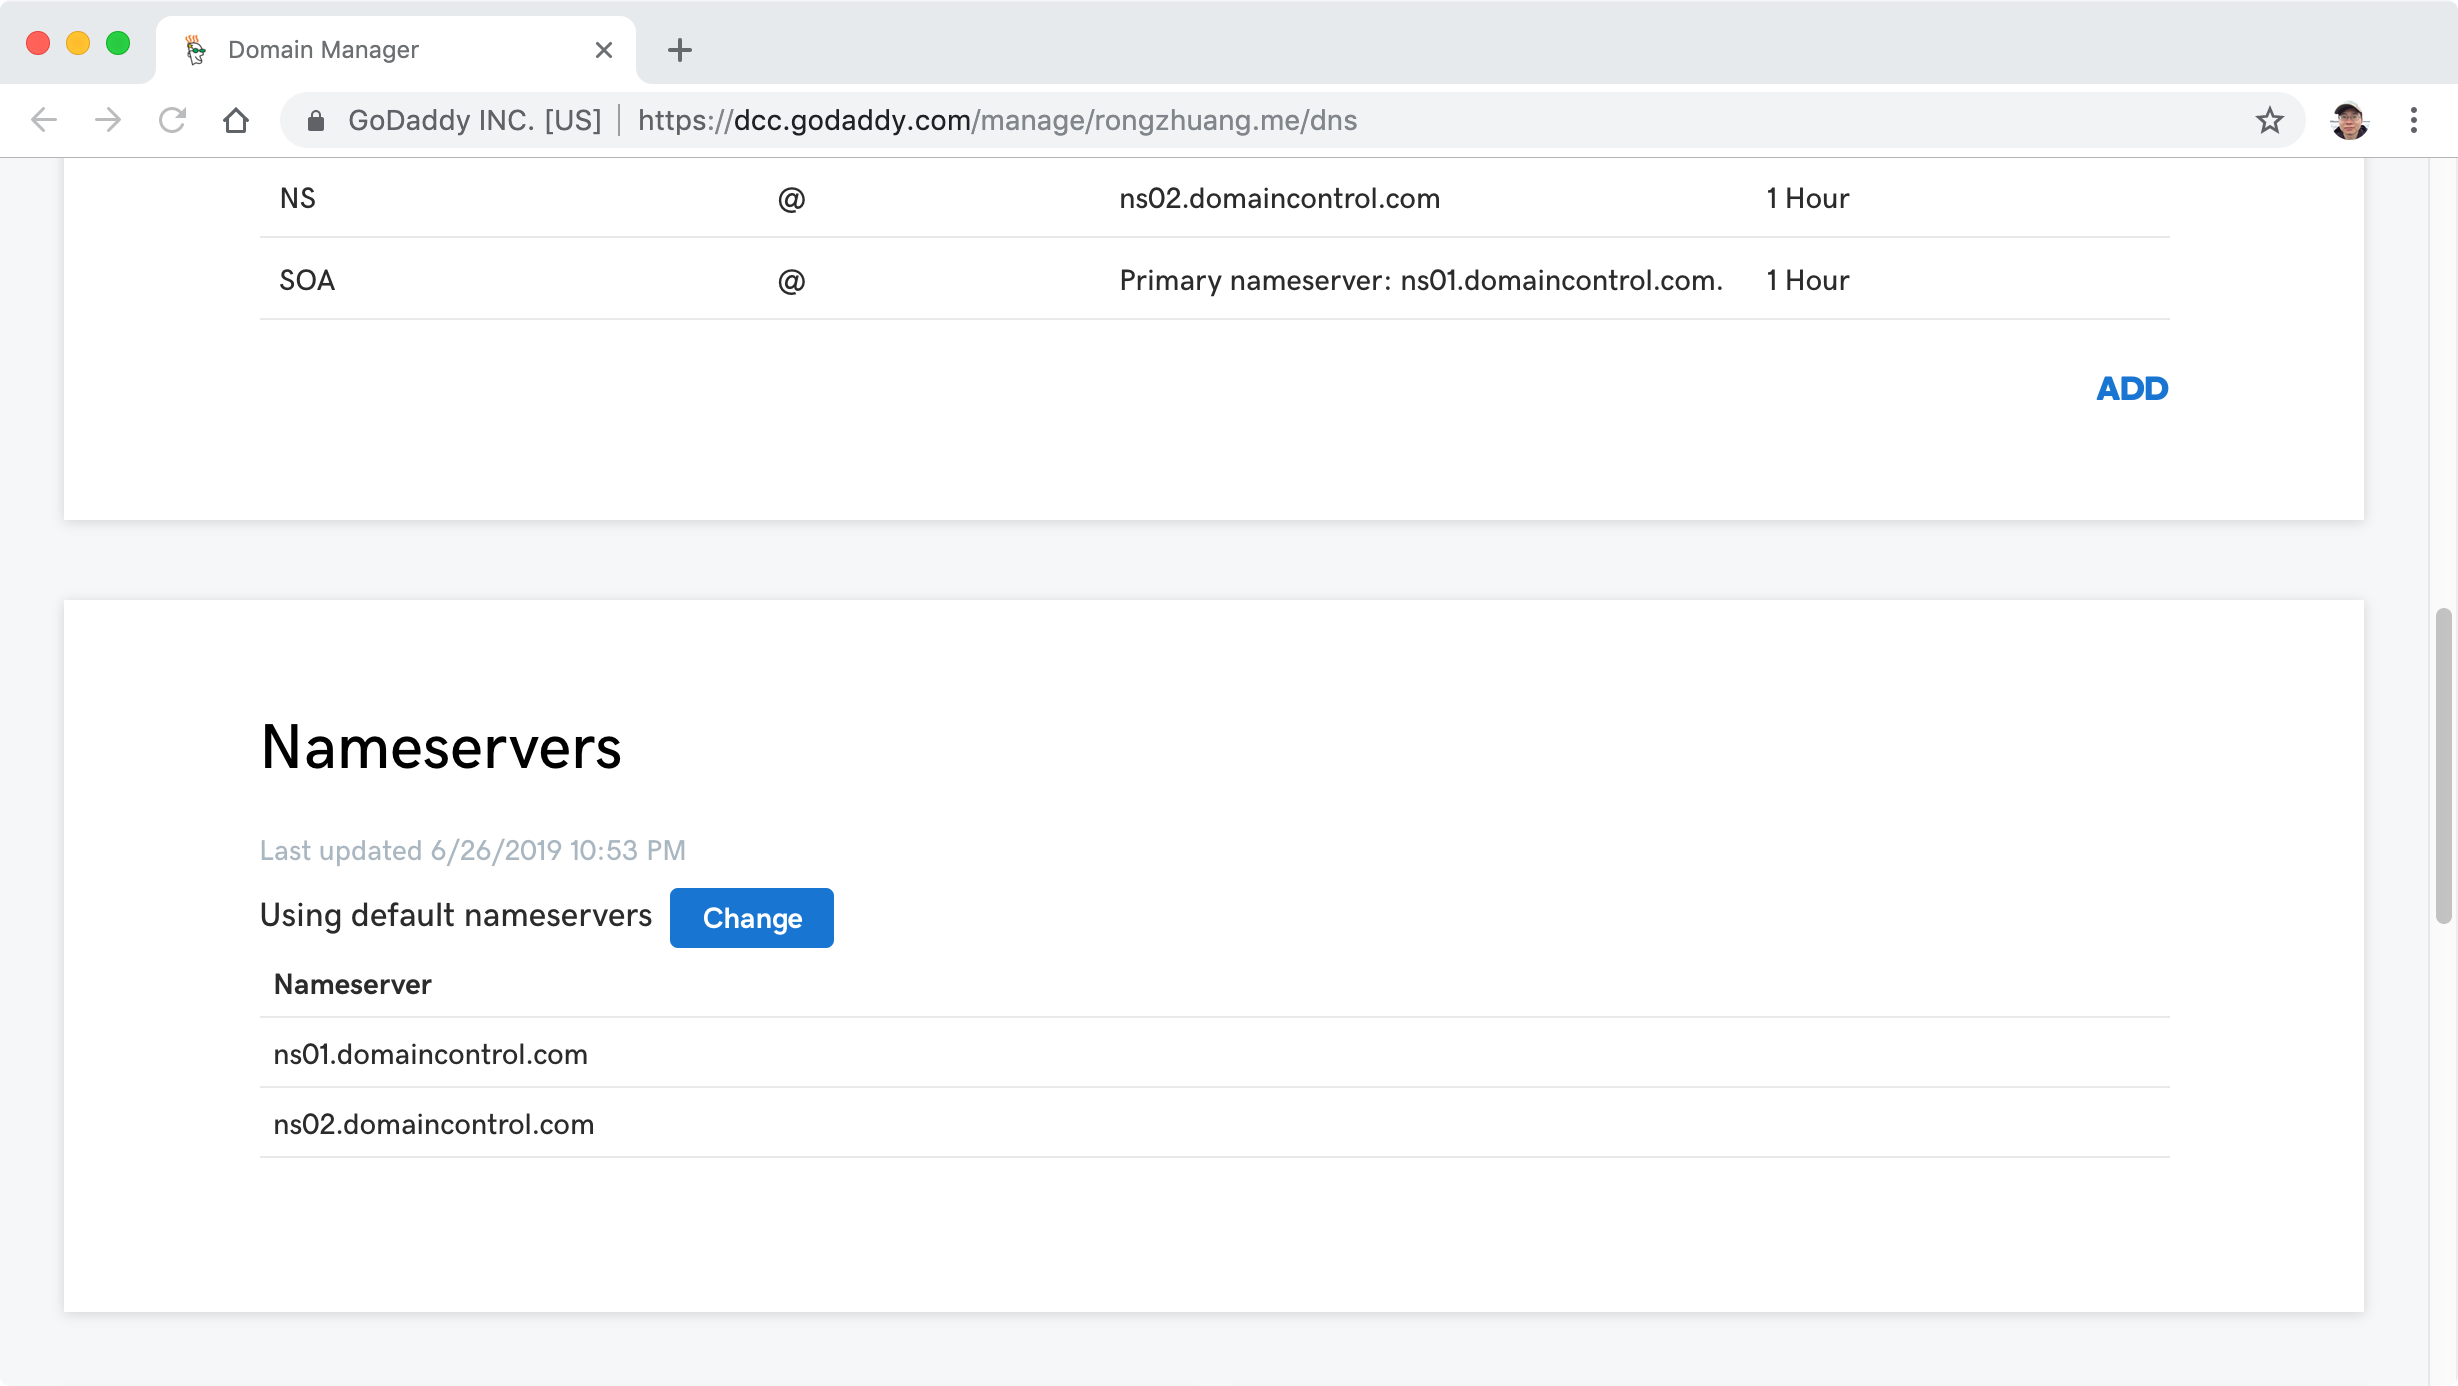
 Scroll down, see the Nameservers section, click ‘Change’ btton.
 Select ‘Custom’ type and input two Cloudflare name servers.
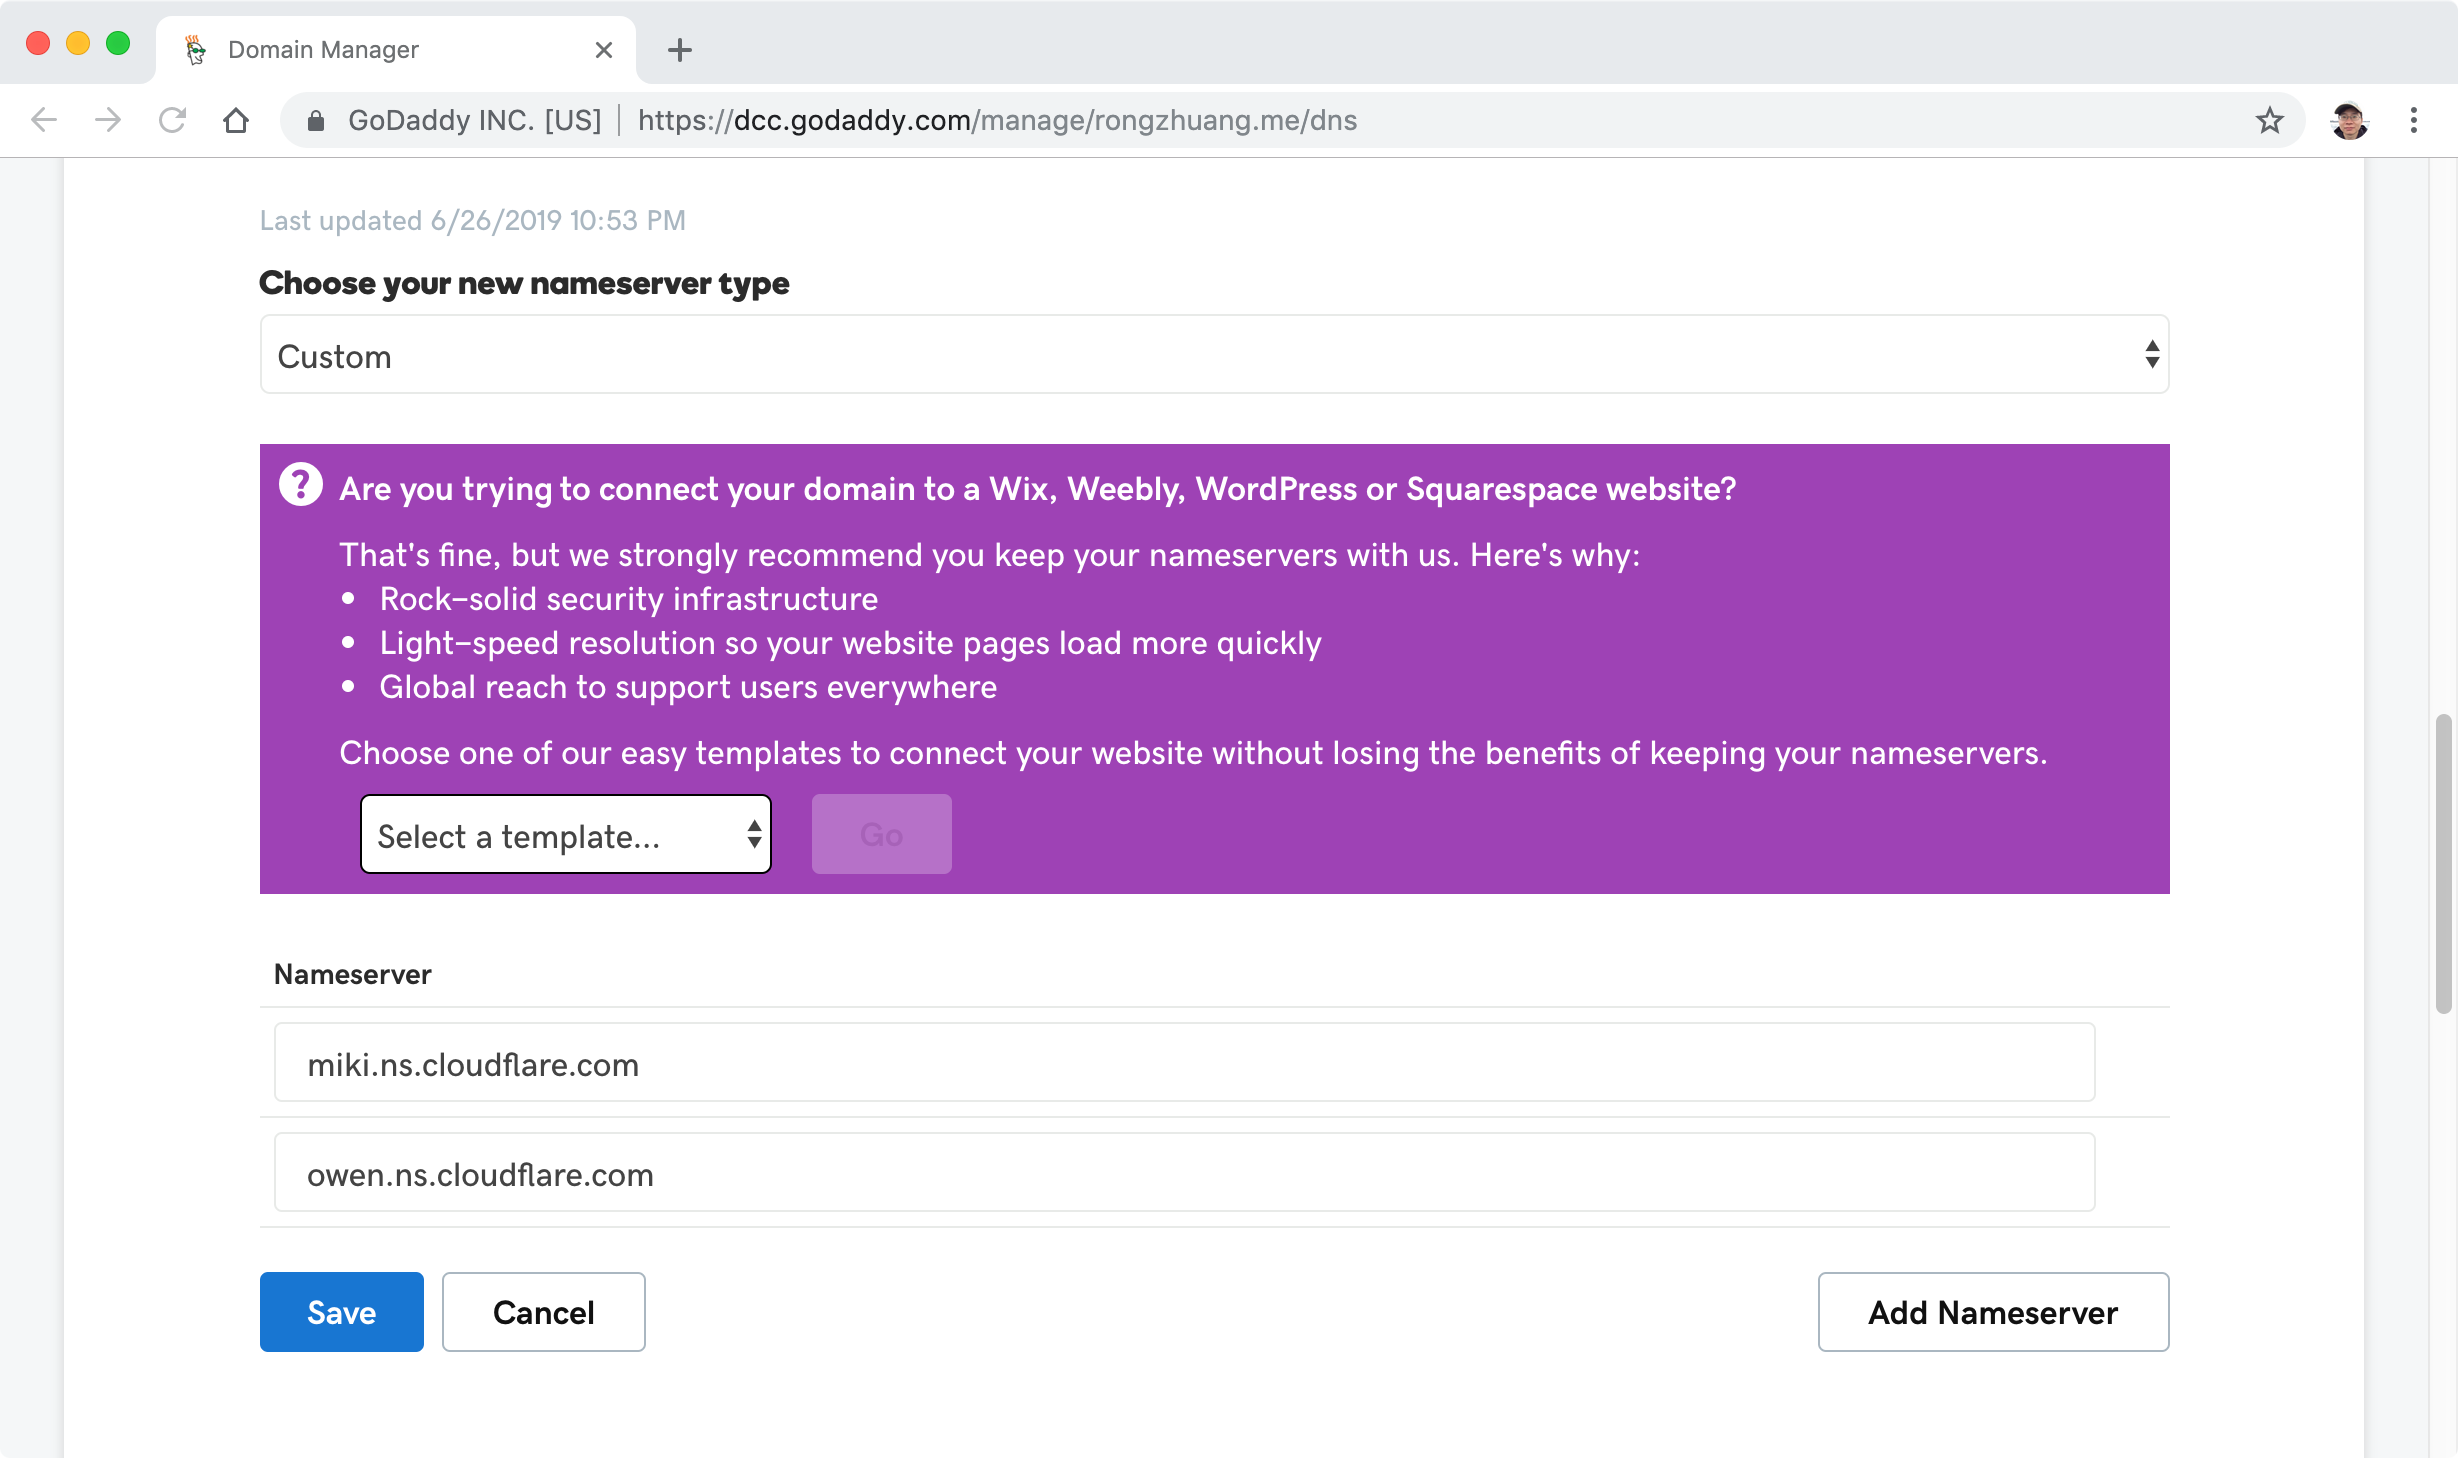 Done.
Done.
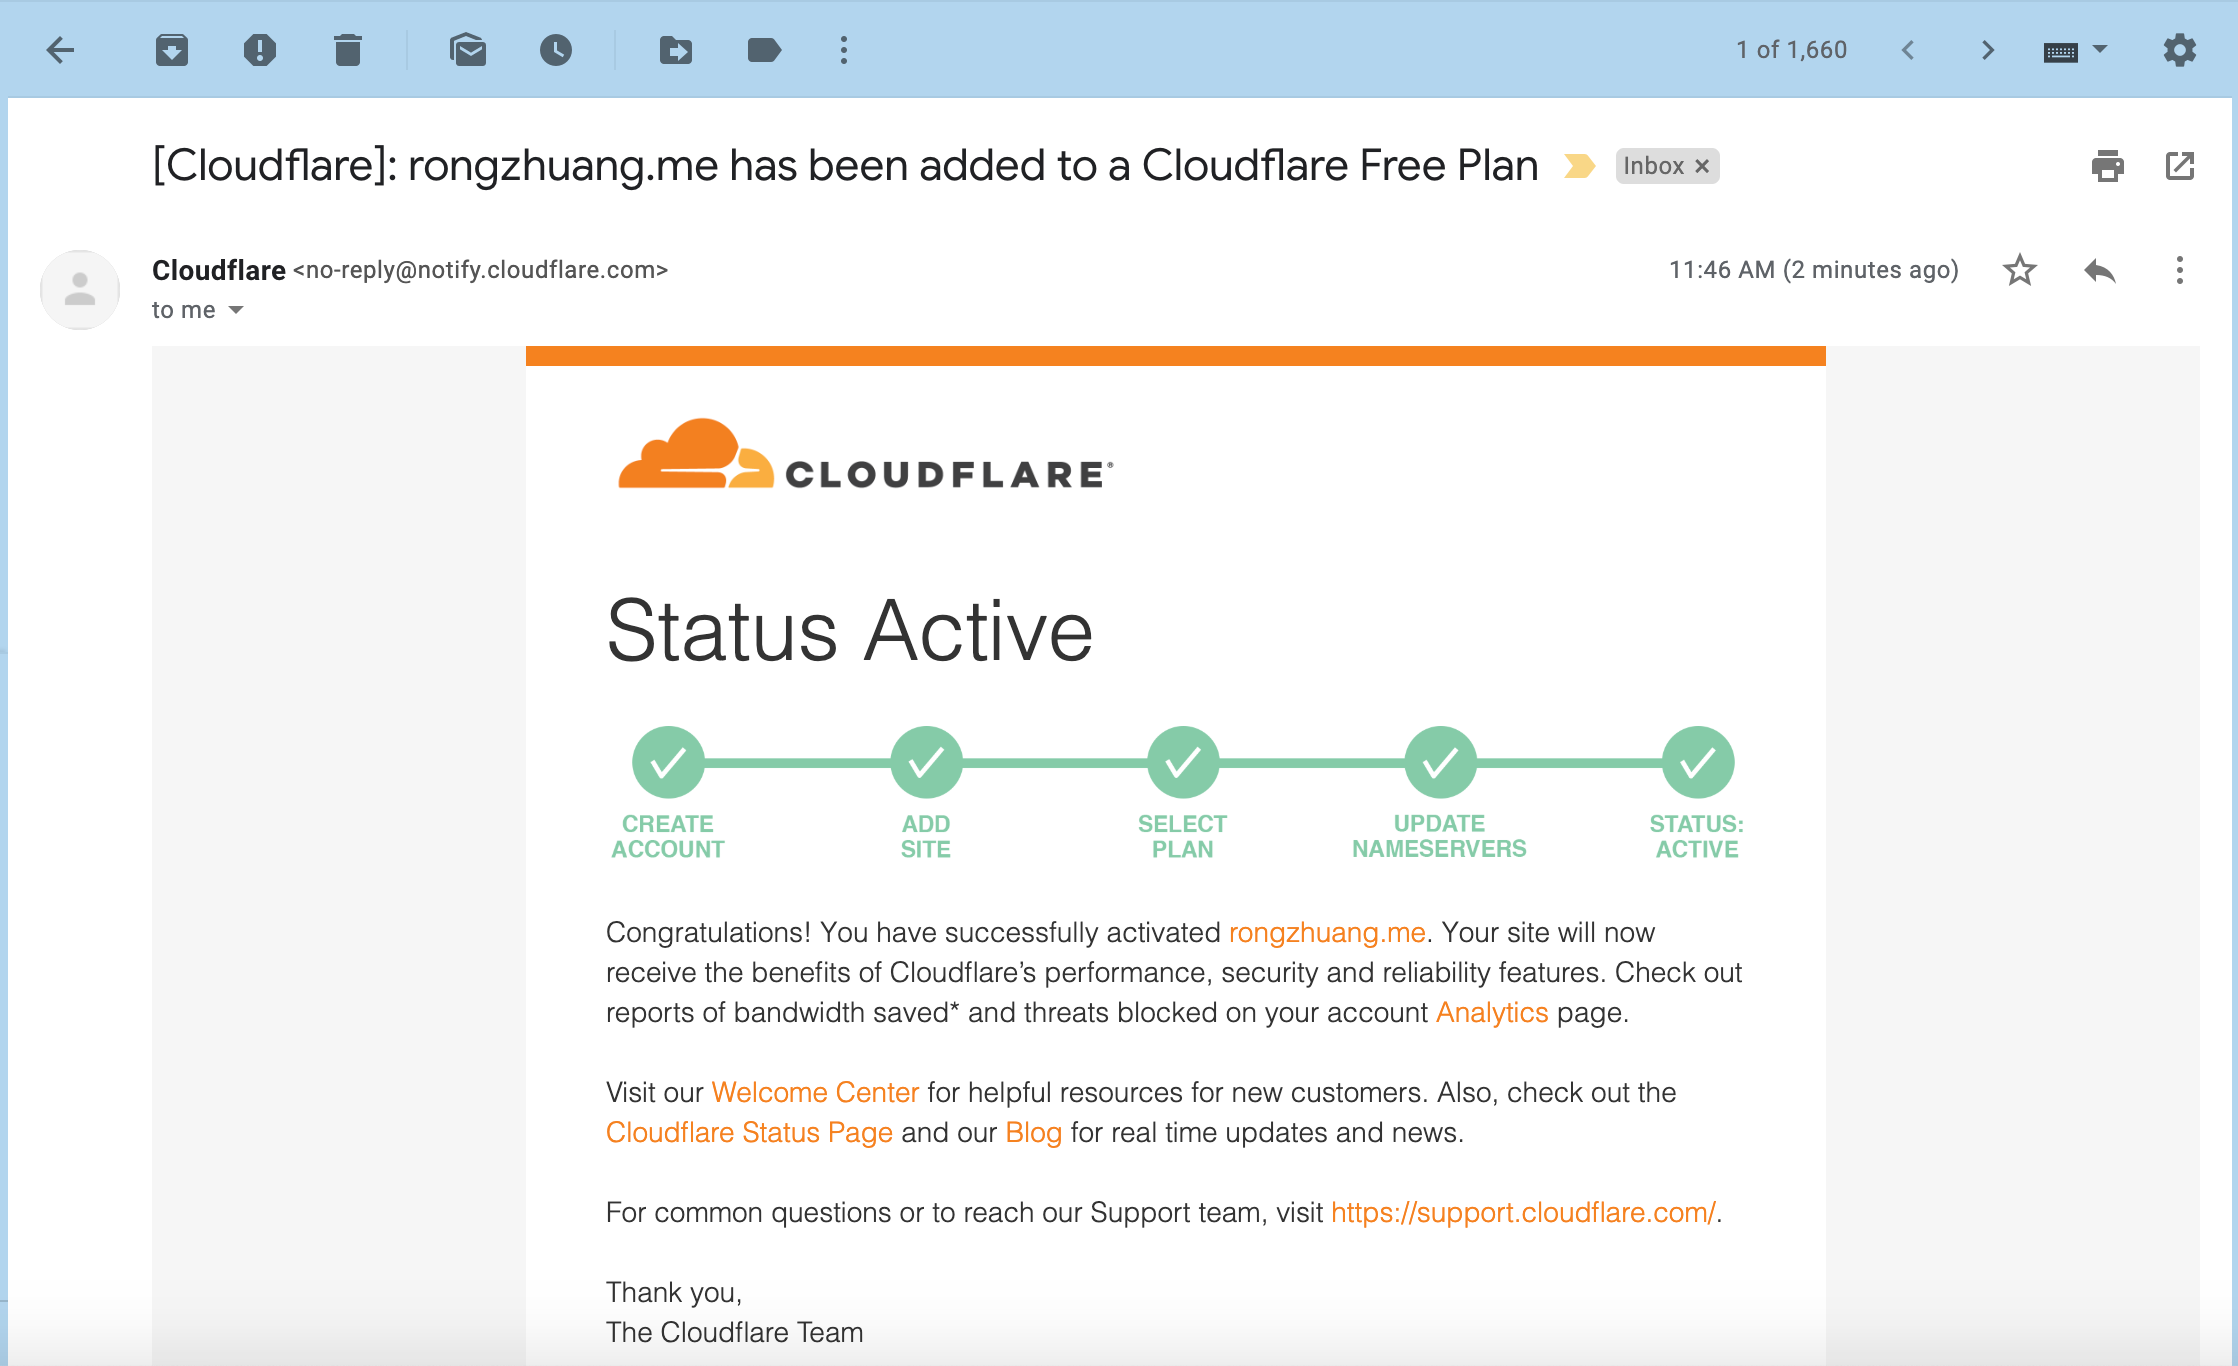
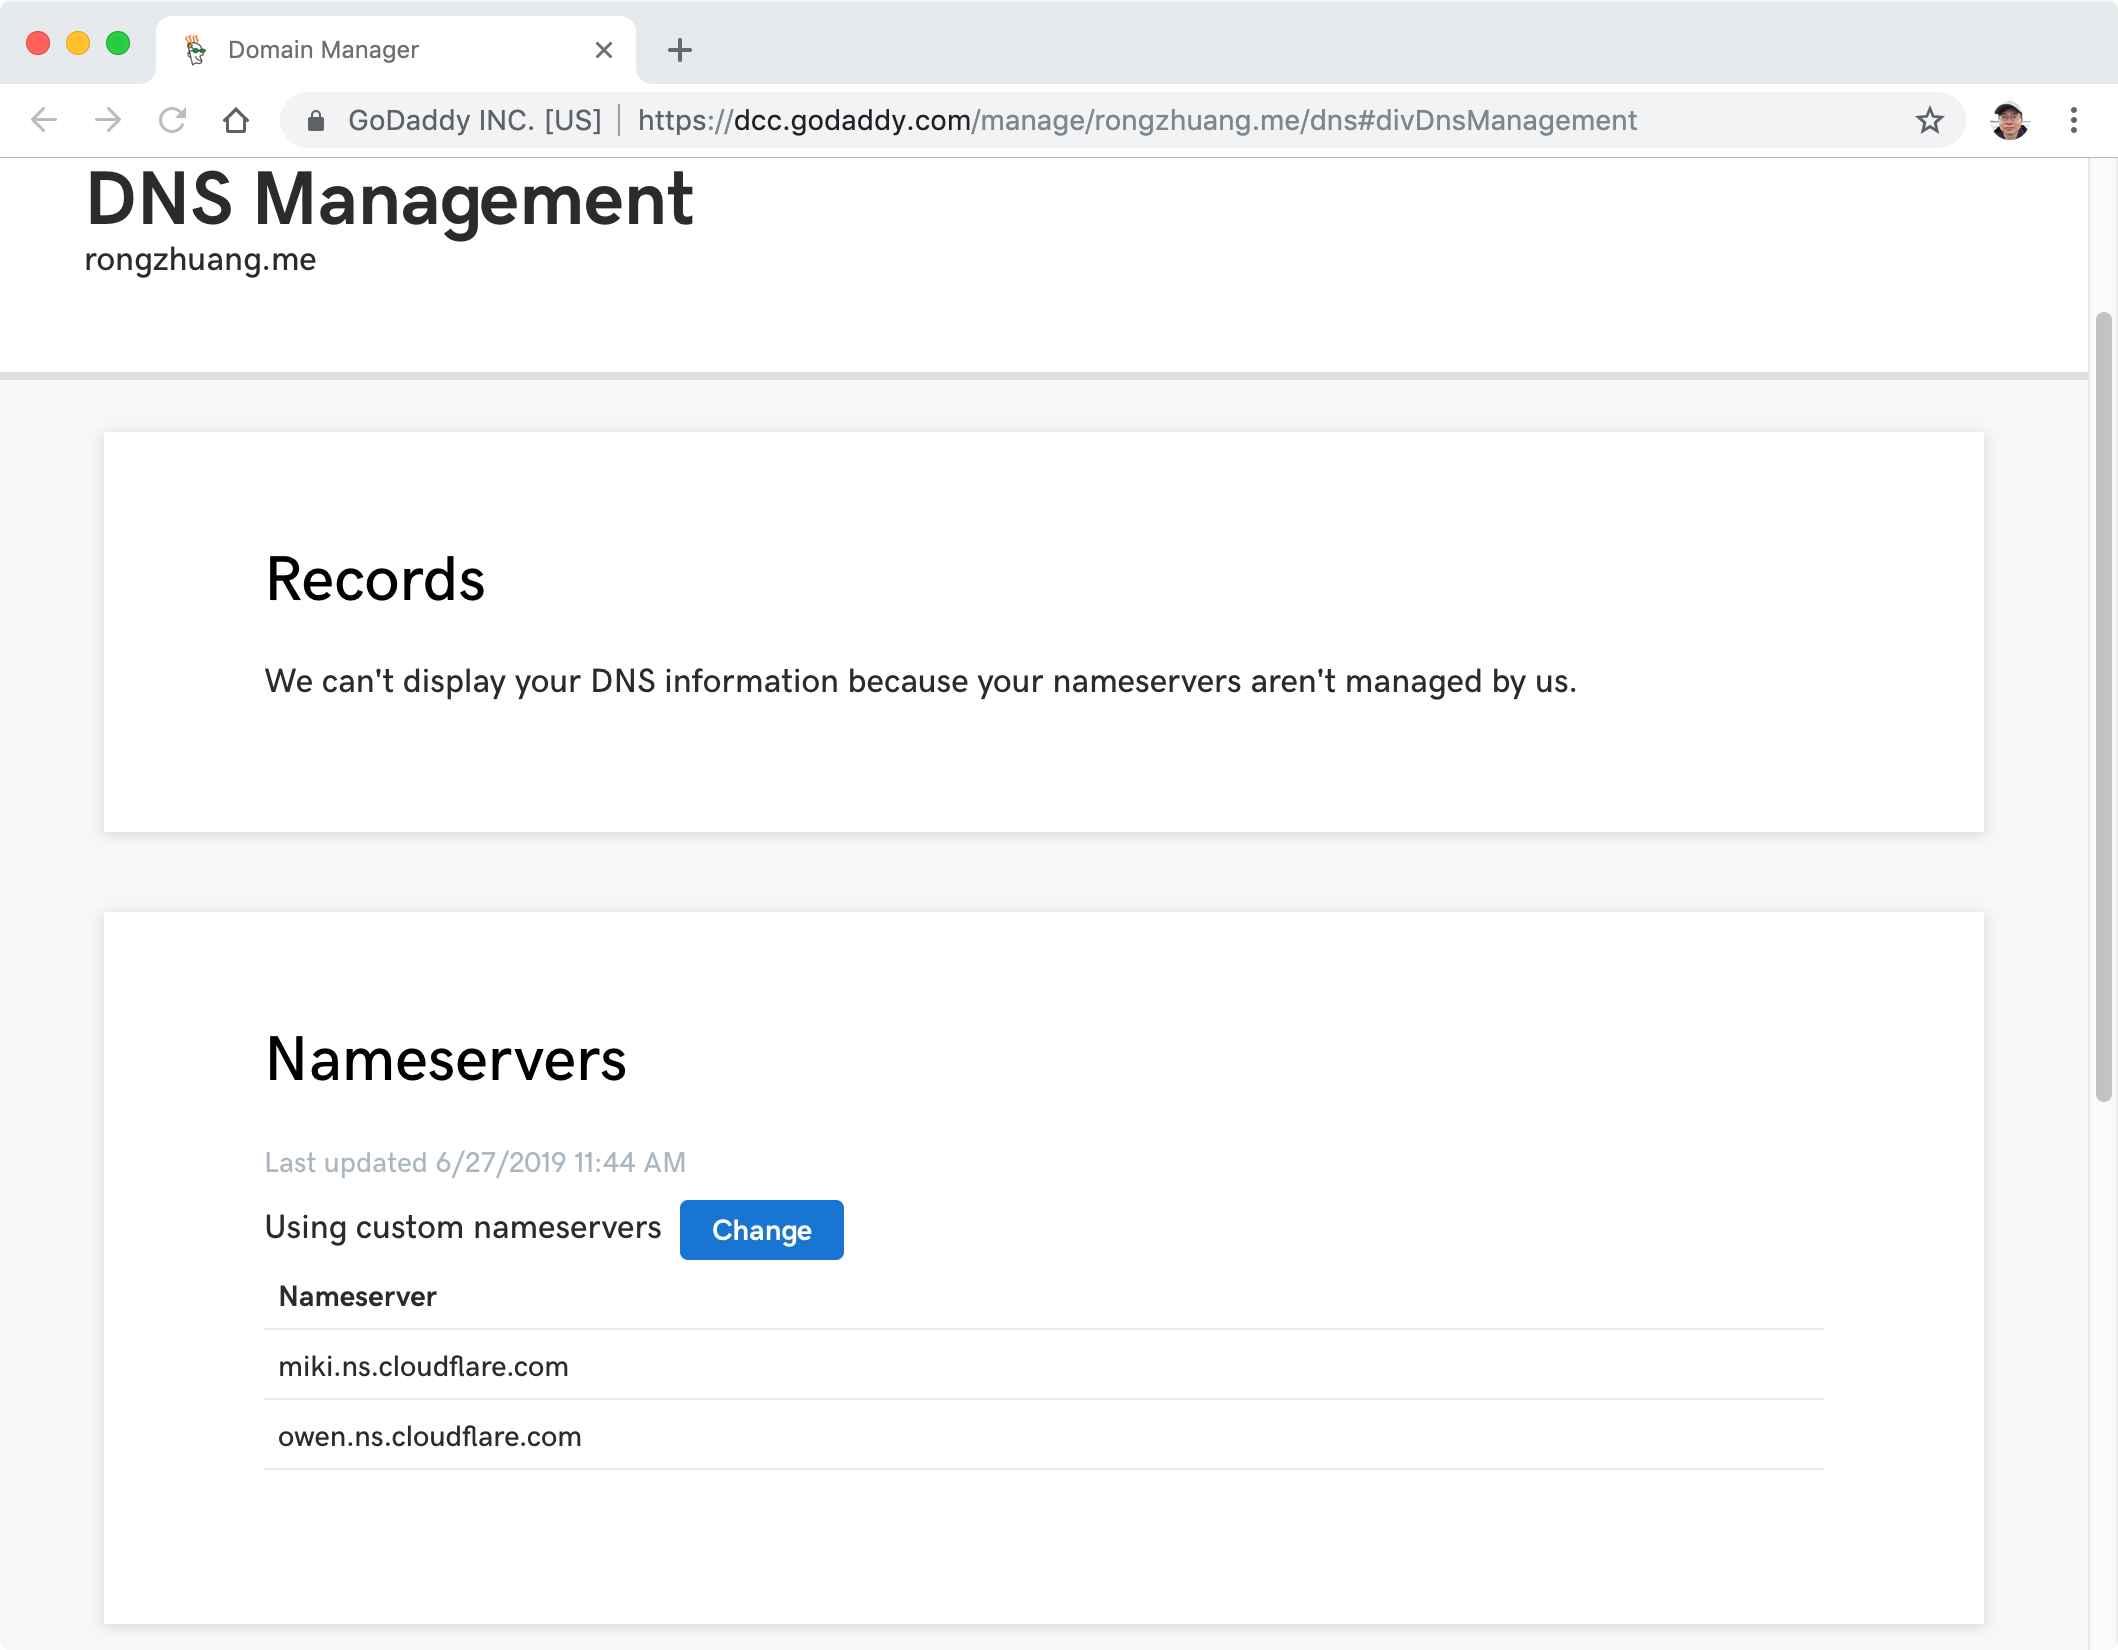 You will receive an email from CloudFlare.
3. Move Javascript Files to Bottom
Put javascript files to the bottom of the page can speed up the loading.
4. Reference
- About robots.txt
- How to Use XML Sitemaps to Boost SEO
- JEKYLL - GENERATING A SITEMAP.XML WITHOUT A PLUGIN
- 10 Must do Jekyll SEO optimizations
- Free Secure Web: Jekyll & Github Pages & Cloudflare
- How to Change Nameservers in GoDaddy?
- How to Deploy Websites on Custom Domains using Cloudflare and Github Pages
- Fix Defer Parsing of Javascript Warning in WordPress Using Async
- Demo - Put Scripts at the Bottom
- Search engine optimization for GitHub Pages